Leather car seats add elegance and value to any vehicle. But over time, they can suffer damage from sunlight, friction, sharp objects, and regular use. Knowing how to repair leather car seats helps preserve the interior and save money.
Why Leather Gets Damaged
Leather is a natural material prone to:
- Cracks due to drying out
- Rips and tears from sharp objects
- Cuts during accidents or misuse
- Discoloration and wear from UV rays
Common Types of Leather Damage
Understanding the damage type helps select the right repair method:
- Surface cracks
- Minor scratches
- Clean cuts
- Deep tears and rips
- Perforated or ventilated leather issues
2. Tools and Materials Needed
Before you start fixing any damage, ensure you have the right gear.
Leather Repair Kit Essentials
Most quality kits include:
- Leather adhesive or filler
- Subpatch fabric
- Color compounds
- Grain paper
- Applicator tools (spatulas, brushes)
Optional but Helpful Tools
- Hairdryer or heat gun (low setting)
- Sandpaper (very fine grit)
- Microfiber cloth
- Leather conditioner
3. Assessing the Damage on Leather Seats
Not all leather damage is the same. A proper evaluation can determine whether you should repair or replace.
Small Cracks vs. Deep Tears
- Small cracks: Easy DIY fix with filler.
- Deep tears or rips: Require patching and color blending.
When to DIY vs. Professional Help
- DIY is great for cosmetic cracks or small tears.
- Call a professional if:
- Damage is on high-tension areas
- Seat has extensive perforation
- The leather is peeling or flaking badly
4. How to Repair Ripped Leather Car Seat
A ripped leather seat may look beyond saving, but it’s often fixable at home.
Step-by-Step Repair Guide
- Clean the area with a leather-safe cleaner.
- Insert a subpatch behind the rip to support the filler.
- Apply leather adhesive or filler over the rip.
- Smooth it out with a spatula and let dry.
- Sand lightly to flatten and blend.
- Color match and dye the area.
- Seal and condition the leather.
Best Practices for Seamless Results
- Always test color on a hidden spot.
- Use thin layers of filler—build gradually.
- Let each layer dry completely before proceeding.
5. How to Repair Tear in Leather Car Seat
Tears can run along seams or cut through panels.
Techniques for Long Straight Tears
- Insert strong subpatch inside.
- Use flexible leather adhesive.
- Press edges together tightly and allow to dry.
Using Subpatches and Adhesives
- Choose fiber mesh or cloth subpatches for support.
- For best results, sand edges around the tear before applying filler.
6. How to Repair Torn Leather Car Seat
Torn leather can be intimidating, but the fix is similar to rips—with more precision.
Deep Gashes and Structural Damage
- Larger torn sections need layered filler.
- Use leather grain paper to replicate texture.
Matching Color and Texture
- Blend dye in light coats.
- Use a sponge or airbrush for a factory finish.
7. How to Repair Leather Car Seats with Cracks
Surface cracking is common and can be repaired in under an hour.
Surface Cracks Treatment
- Clean thoroughly, removing oils and dirt.
- Apply leather filler directly into cracks.
- Smooth with a spatula and let it cure.
- Lightly sand and apply dye.
Preventing Future Cracks
- Use leather conditioner monthly.
- Avoid direct sunlight and high heat.
8. How to Repair Cut in Leather Car Seat
Clean cuts are easier to fix than ragged rips.
Mending Clean Cuts
- Apply adhesive under the cut edges.
- Pinch edges together until secure.
- Cover with leather repair compound.
Finishing Techniques for Invisibility
- Use matching dye and grain stamps.
- Apply sealer to protect the area.
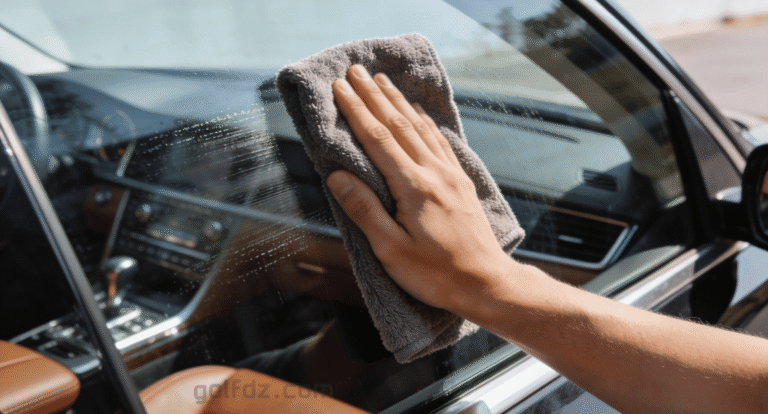
9. Cleaning Before Repairing Leather
Clean leather is critical for adhesive bonding and color application.
Best Cleaning Products
- pH-balanced leather cleaner
- Isopropyl alcohol (for degreasing)
What to Avoid While Cleaning
- Harsh soaps
- Ammonia-based cleaners
- Abrasive sponges
10. Using a Leather Repair Kit Effectively
Follow the instructions in your kit, but keep these tips in mind.
How to Use Filler Compounds
- Apply in multiple layers.
- Let each layer fully cure.
- Sand between layers for smoothness.
Blending and Coloring Tips
- Match leather color in daylight.
- Use q-tips or detail brushes for precision.
11. DIY vs. Professional Repair Services
Each option has its benefits depending on the damage and budget.
| Feature | DIY Repair | Professional Service |
|---|---|---|
| Cost | Low (Under $50) | High ($100–$500) |
| Time | 1–3 hours | 2–5 days |
| Skill Required | Moderate | None |
| Result Quality | Good (with practice) | Excellent |
12. Common Mistakes to Avoid in Leather Repair
Avoid these rookie errors:
- Skipping cleaning before applying filler
- Using wrong glue or household adhesive
- Color mismatch
- Over-sanding, which weakens leather
13. Leather Seat Maintenance After Repair
Preserve your hard work with proper care.
Conditioning and Protecting Leather
- Use UV-resistant conditioners
- Apply every 3 months
How Often to Reapply Treatments
- Heavy-use vehicles: monthly
- Garage-kept cars: every 4-6 months
14. How to Match Color and Texture Accurately
Blending color and texture is key to a hidden repair.
Dyes vs. Paints
- Dyes soak in for a natural finish.
- Paints sit on top but may wear faster.
Tools to Create Leather Grain Effects
- Grain paper
- Silicone molds
15. Repairing Perforated or Ventilated Leather
These require extra caution.
Special Precautions
- Avoid letting filler clog holes.
- Use fine-tipped tools.
Best Repair Methods
- Adhesive and dye only (no filler)
- Work slowly and section by section
16. How to Prevent Future Leather Damage
Being proactive saves money and time.
Daily Habits That Help
- Use seat covers if parked outdoors
- Avoid sharp objects like keys, tools
- Don’t slide in/out aggressively
Recommended Products
- Leather conditioners (Lexol, Chemical Guys)
- UV protectants (303 Aerospace)
17. Frequently Asked Questions (FAQs)
Q1. Can I use super glue to fix leather car seats?
No. Super glue can damage leather fibers and turn hard and brittle.
Q2. How long does a DIY leather repair last?
With proper care, it can last 1–3 years.
Q3. Is it better to replace or repair a leather seat?
Repair if the damage is minor or cosmetic; replace for large structural damage.
Q4. Can I repair leather seats without a kit?
Yes, but kits simplify the process and offer better results.
Q5. What color repair compound should I use?
Choose the closest color match. Some kits offer mixable tints for custom matching.
Q6. Can I repair fake (PU) leather the same way?
No. PU leather requires different adhesives and may not hold long-term repairs.
18. Conclusion
Learning how to repair leather car seats isn’t just a money-saver—it’s empowering. With the right tools, patience, and a bit of care, even badly cracked, cut, or torn leather can look brand new again. Whether you’re fixing a small crack or a full rip, a DIY approach is often more than enough to restore your car’s interior.
🔗 External Resource: Leather Repair Techniques – The Family Handyman