
Driving at night with a burnt-out headlight isn’t just frustrating; it’s highly dangerous and can easily get you pulled over for a traffic ticket. Reduced visibility drastically impacts your reaction time, putting you, your passengers, and pedestrians at risk. When that beam of light vanishes, many drivers immediately stress about expensive repair bills. Dealerships often charge steep hourly labor rates for what is essentially a basic, entry-level maintenance job.
Fortunately, a VW Golf headlight bulb replacement is a straightforward DIY task that takes about 15 minutes and requires almost no tools. You do not need a mechanical background to get this done. With a little patience and the right instructions, anyone can pop the hood and swap out a bad bulb in their driveway. Maintaining perfect nighttime visibility is a critical part of your overall VW Golf Maintenance & Service routine, ensuring you and your passengers stay safe on the road.
In this comprehensive guide, we will walk you through exactly how to change a VW Golf headlight. We cover everything from identifying the right VW Golf headlight bulb size to sharing industry secrets—like the crucial rule of handling halogen glass. By the end of this article, you will have the knowledge and confidence to tackle this project yourself.
Signs You Need a VW Golf Headlight Bulb Replacement
Your vehicle usually gives you several hints before a headlight completely dies. Recognizing these early warning signs gives you time to purchase a replacement bulb and swap it out before you find yourself driving home in pitch darkness.
- Completely Dead Bulb: This is the most obvious sign. You turn on your lights, and one side remains completely dark. If both sides die at the exact same time, you likely have an electrical issue rather than two simultaneously blown bulbs.
- Flickering Over Bumps: Does your headlight strobe or flicker when you hit a pothole? The filament inside the bulb is likely damaged and hanging by a thread. The vibration breaks and reconnects the circuit.
- Dimming Lights: Over time, standard halogen bulbs slowly lose their brightness. If the road ahead looks noticeably darker than it did a year ago, your bulbs are reaching the end of their lifespan.
- Dashboard Warning Light: Modern VW Golfs feature smart onboard computers. If a bulb burns out, you will typically see a yellow light bulb icon illuminate on your dashboard gauge cluster, accompanied by a message stating “Check left/right dipped headlight.”
Important Troubleshooting Step: Before buying a new bulb, you should ensure the issue isn’t electrical. A blown fuse can also cause a headlight to stop working. Check our VW Golf fuse box diagram to verify your light fuses are intact.
What Size Headlight Bulb Does a VW Golf Use?

Finding the correct VW Golf headlight bulb size is the first step in this DIY project. Volkswagen has produced many generations of the Golf over the decades, and bulb sizes vary depending on the generation (Mk6, Mk7, Mk8) and the specific trim level of your car.
For example, a base model Mk7 Golf likely features standard reflector halogen headlights, while higher trims like the GTI or Golf R might have Bi-Xenon HID (High-Intensity Discharge) or fully integrated LED headlamps. If your car has factory LED headlights, you generally cannot replace a single bulb; you must service the entire unit. However, for the millions of Golfs equipped with halogen housings, replacement is simple.
Below is a quick reference chart for common standard halogen bulb sizes found in popular modern VW Golf models. Always check your specific owner’s manual to be 100% sure before purchasing parts.
| Lighting Function | Common Bulb Size (Mk6 / Mk7) | Expected Lifespan | Wattage |
|---|---|---|---|
| Low Beam Headlight | H7 | 500 – 1000 Hours | 55W |
| High Beam Headlight | H15 or H7 (Varies by year) | 500 – 1000 Hours | 55W |
| Front Fog Lights | H11 or H8 | 1000+ Hours | 35W – 55W |
| Front Turn Signals | PW24W or 7506 | 2000+ Hours | 21W |
When shopping for an H7 bulb replacement VW Golf owners often face a wall of choices at the auto parts store. You will see “Long Life” bulbs, “Ultra Bright” bulbs, and “White Light” bulbs. Keep in mind that ultra-bright halogen bulbs burn hotter and generally have a shorter lifespan than standard OEM-style replacements.
Tools and Materials You Will Need
One of the best things about a VW Golf headlight bulb replacement is the incredibly short tools list. You do not need an entire toolbox. In fact, for most Mk6 and Mk7 models, you don’t even need a screwdriver.
Gather the following items before you begin:
- The Correct Replacement Bulb: Confirm your size (e.g., H7 for low beams). Always buy these in pairs. We will explain why later in the conclusion.
- Clean Latex or Nitrile Gloves: This is arguably the most important tool on the list. You must protect the new bulb from your skin.
- Safety Glasses: Always protect your eyes when working under the hood. Headlight bulbs are pressurized glass capsules that can shatter if dropped.
- A Bright Flashlight or Headlamp: The back of the headlight housing is dark. Good lighting makes finding the locking tabs much easier.
- A Clean Microfiber Towel: Useful for wiping away dirt around the headlight assembly so debris doesn’t fall into the housing.
Workspace Note: On the driver’s side, space can be very tight because of the battery. If your battery is old or corroded, this might be a good time to do a quick VW Golf battery replacement while you are working in that area.
Step-by-Step: How to Change the Headlight Bulb in a VW Golf
You have your parts, you have your gloves, and you are ready to work. Follow these steps carefully to ensure a smooth, frustration-free installation. We will use the common Mk7 Golf headlight bulb process as our baseline, though the steps apply broadly across most modern generations.
Step 1: Safety First (Turn off the car)
Never work on your vehicle’s electrical system while the power is live. Park your Golf on a flat, level surface and engage the parking brake. Turn off the engine completely.
Remove the keys from the ignition to ensure no accidental power runs to the headlights while your hands are near the wiring. If your car has a push-to-start button, ensure the accessory mode is entirely shut down. Open the hood and prop it up securely.
Step 2: Access the Headlight Assembly
Stand at the front of the car and look down behind the headlight lens that has the burnt-out bulb. You will see the back of the black plastic headlight assembly.
Locate the large, round rubber or plastic dust cover protecting the back of the low-beam bulb compartment. Grab the outer edges of this dust cover and firmly twist it counterclockwise. It usually only takes a quarter-turn to unlock. Pull the cover straight back and set it aside in a safe, clean place.
Note for passenger side vs. driver side: The passenger side typically offers plenty of room near the windshield washer fluid reservoir. The driver side is tighter due to the battery box. Take your time and use your flashlight to see exactly what you are grabbing.
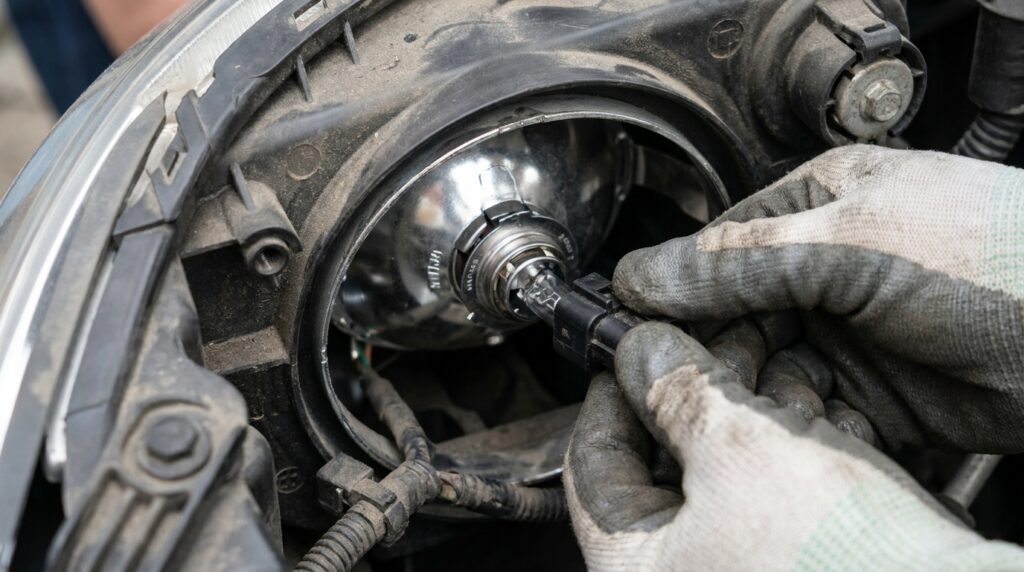
Step 3: Remove the Old Bulb
With the dust cover removed, peer inside the housing. You will see the back of the bulb and the electrical connector plugged into it.
Depending on your exact year, the bulb is held in place by either a twist-lock base or a metal spring retaining clip. Most modern VW Golfs use a simple twist-lock mechanism. Grab the black plastic connector attached to the bulb. Twist the entire connector counterclockwise about a quarter of a turn. You will feel it unlatch.
Carefully pull the bulb and connector straight back out of the housing. Once it is clear of the headlight assembly, wiggle the old glass bulb straight out of the electrical plug. Do not twist the glass itself, just pull it straight out of the socket.
Step 4: Install the New Bulb (CRITICAL RULE)
This step separates successful DIYers from those who end up back at the auto parts store three weeks later.
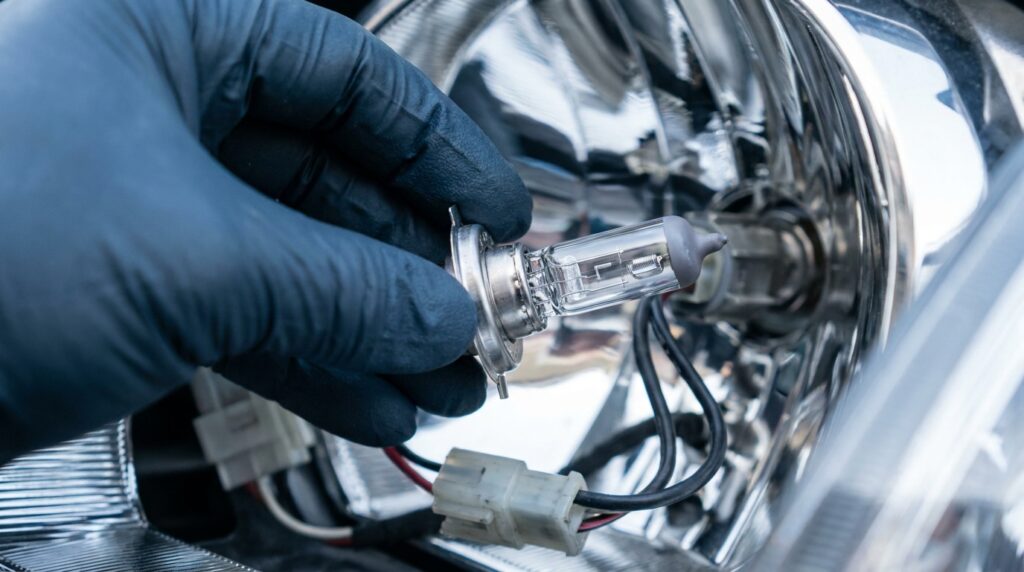
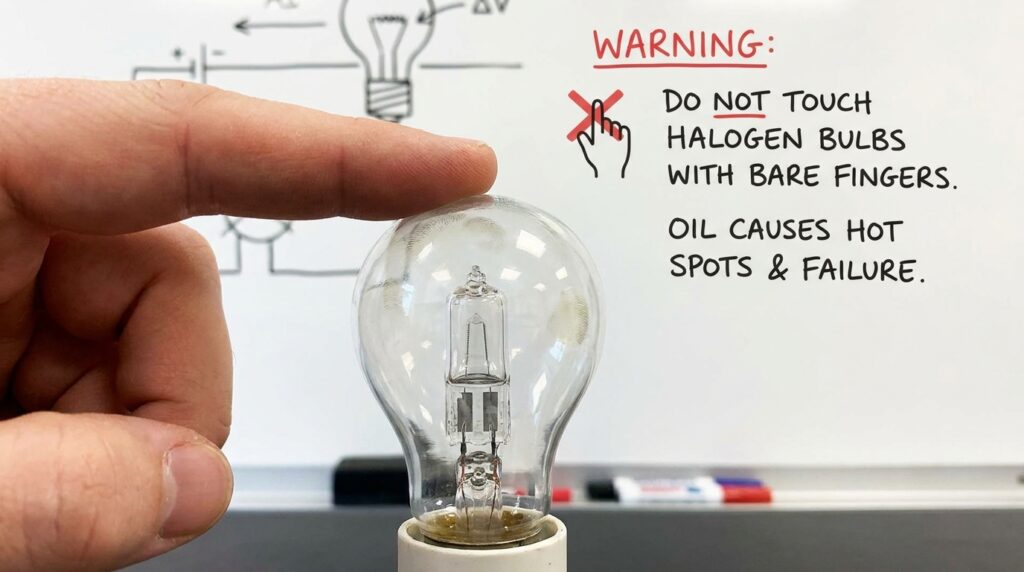
CRITICAL RULE: Never touch the glass of the new halogen bulb with your bare fingers! The natural oils and salts from human skin transfer to the glass. When you turn the headlights on, the bulb reaches extreme temperatures. The oil creates a localized hot spot on the quartz glass, causing the bulb to shatter or burn out in a matter of weeks. Always wear clean latex or nitrile gloves!
Put your clean gloves on. Remove the new bulb from its packaging by holding it purely by its metal base. Align the metal prongs on the new bulb with the slots on the electrical connector.
Push the bulb firmly into the plug until it is fully seated. Make sure it sits perfectly flush. If it is crooked, the light beam will point in the wrong direction and blind oncoming traffic.
Step 5: Reinstall the Dust Cover
Carefully guide the new bulb and connector back into the headlight housing. Look through the clear front lens of the headlight from the outside of the car; this helps you see if you are guiding the bulb directly into the center hole.
Once the bulb is seated flat against the housing, push in slightly and twist it clockwise to lock it into place. Give it a gentle tug to ensure it is secure and doesn’t rattle.
Finally, retrieve your round dust cover. Align the tabs, press it against the housing, and twist it clockwise until it locks firmly. Securing this cover tightly is vital. If you leave it loose, moisture and humidity will enter the assembly, causing condensation that ruins the reflective interior of your headlight housing.
Before closing the hood, turn on your car and test the headlights to ensure the new bulb shines brightly.
Now that your headlights are shining brightly, make sure your windshield is crystal clear to maximize visibility. Check our guide on VW Golf windshield wipers size to pair your new lights with fresh wiper blades.
Halogen vs. LED Upgrades: Should You Switch?
During a VW Golf headlight bulb replacement, many owners ask themselves: “Should I upgrade VW Golf headlights to LED?”
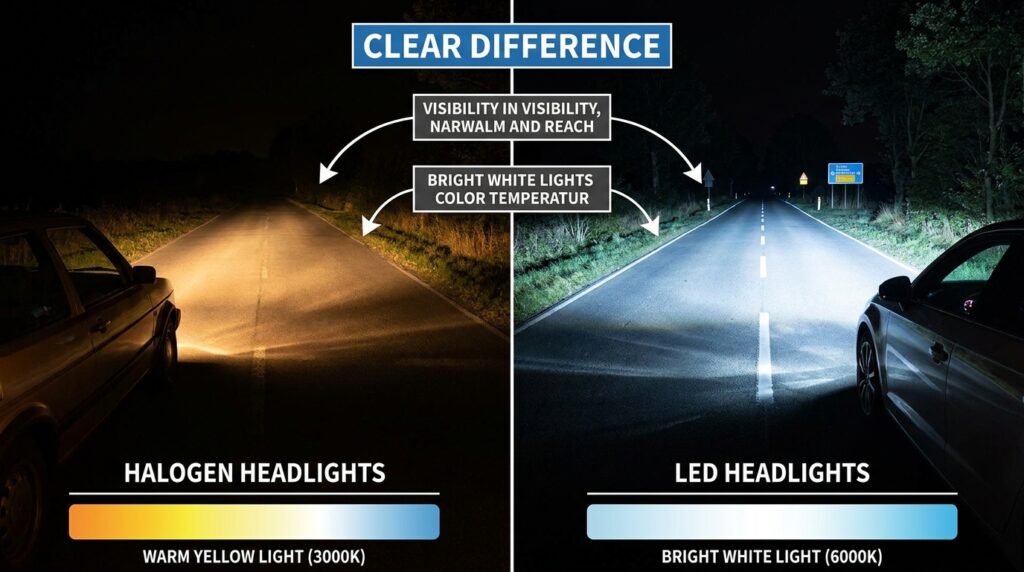
It is a highly popular modification. Factory halogen bulbs emit a slightly yellowish light, whereas aftermarket LED bulbs offer a crisp, modern, bright white light (usually around 6000K color temperature). LEDs use less power, generate less forward heat, and can last tens of thousands of hours longer than standard halogens.
However, upgrading is not always as simple as a direct swap. Here are three things you must know before making the jump:
- CANbus Errors: The VW Golf uses a sensitive CANbus electrical system. Because LEDs draw significantly less power than halogens, the car’s computer thinks the bulb is burnt out. This triggers a persistent error code on your dashboard. If you upgrade, you must purchase “CANbus Error-Free” LED bulbs or install load resistors.
- Beam Pattern Compatibility: Halogen headlight housings use carefully engineered reflectors designed to bounce light from a glowing wire filament. LED bulbs emit light from flat diodes. Sometimes, putting an LED into a halogen reflector scatters the light, blinding oncoming drivers while actually reducing your usable road vision. Ensure you buy LEDs specifically designed to mimic a halogen filament pattern.
- Legal Compliance: Check your local road laws. According to organizations like the National Highway Traffic Safety Administration (NHTSA) and various European transport authorities, dropping aftermarket LED bulbs into halogen housings may not meet street-legal safety standards in all regions.
“An LED upgrade transforms the look of your VW Golf at night, giving it the premium aesthetic of higher-tier models. Just take the time to aim your headlights properly after installation so you respect other drivers on the road.”
Frequently Asked Questions (FAQs)
Even with a detailed guide, questions pop up. Here are answers to the most common queries VW Golf owners have when dealing with exterior lighting.
Do I need to remove the front bumper to change a VW Golf headlight bulb?
No. To change just the bulb, you can access it from behind the assembly under the hood. The space might be tight, but it is completely doable without dismantling your car’s front end. You only need to remove the bumper if you are replacing the entire headlight housing due to a crash, severe UV damage, or a cracked lens.
Why do my new headlight bulbs keep burning out so fast?
If they burn out quickly, it is usually because the installer touched the glass with bare hands. As explained earlier, skin oils ruin quartz glass rapidly. Another reason could be excessive road vibration (ensure the bulb is locked in tightly) or a failing alternator sending electrical voltage spikes through the system. Also, avoid buying cheap, unbranded bulbs online; stick to reputable brands like Philips, Sylvania, or Osram.
Will changing the bulb reset my dashboard warning light?
Yes, in most VW Golfs, the “check exterior light” warning will turn off automatically once the car senses the new, working bulb is installed and you turn the headlights on. The computer constantly measures electrical resistance, so the fix registers instantly. If your dashboard is showing other maintenance warnings, you may need to manually clear them. Learn how to reset the service light on a VW Golf easily.
Conclusion
Congratulations! You successfully learned how to perform a VW Golf headlight bulb replacement. By following these steps, you skipped the inconvenience of making a dealership appointment and saved yourself a substantial amount of money in labor costs. Plus, you gained a better understanding of how your vehicle operates.
As a final piece of advice: Always replace your headlight bulbs in pairs. Headlight bulbs generally have identical lifespans. If your driver’s side bulb just blew, the passenger side is likely close behind. Replacing both at the same time ensures your headlights project an even, balanced beam pattern and color, preventing you from driving with one bright light and one dim, yellowing light.
To keep your headlights looking as good as they function, don’t forget to wash away bugs and grime. Follow our ultimate VW Golf detailing & car wash guide for crystal-clear lenses. Proper exterior care prevents the plastic housings from yellowing and blocking the light you just worked hard to restore.
Keep track of all your vehicle’s needs by bookmarking our VW Golf service intervals & schedule. Regular maintenance is the key to keeping your Volkswagen running efficiently and safely for years to come!